How to prevent Windows users from changing the computer time
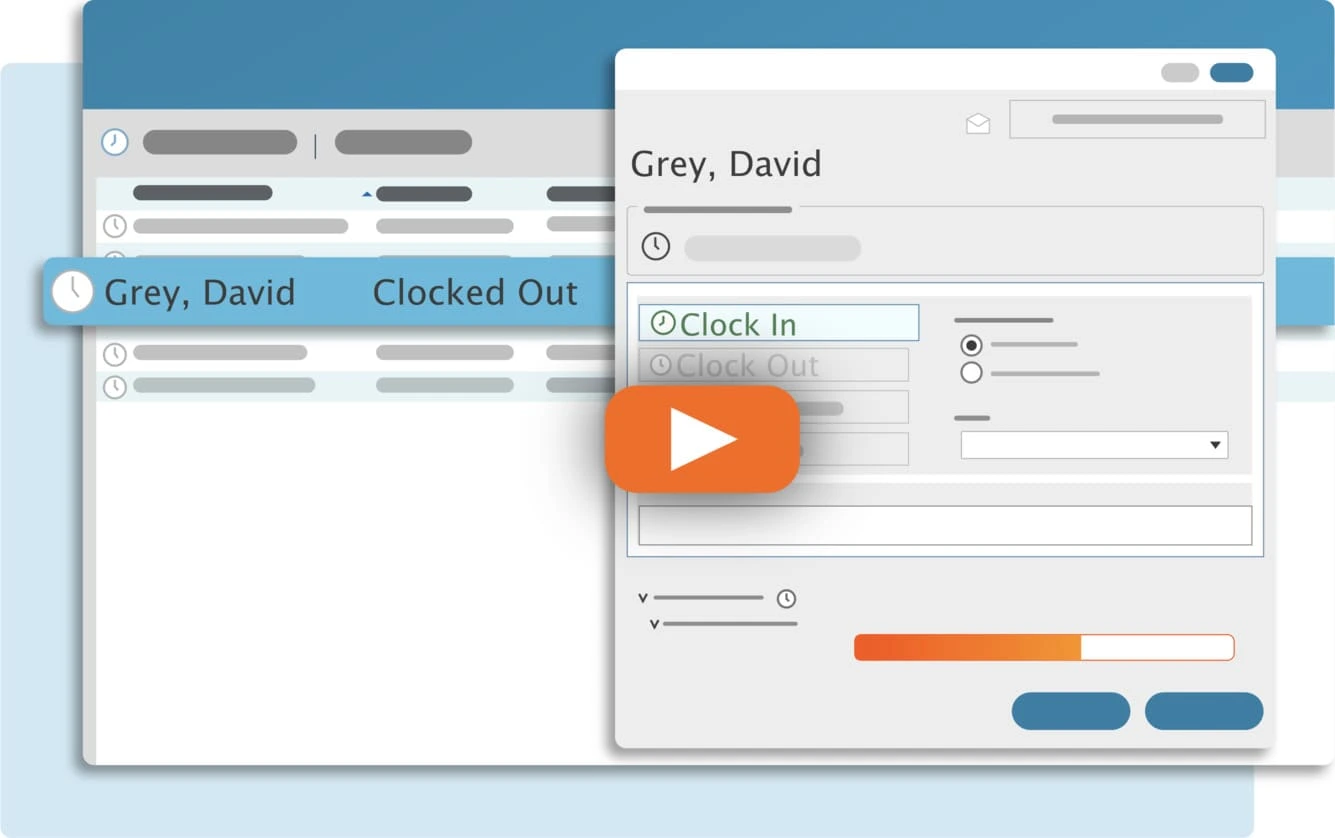
Time theft is a significant concern when it comes to purchasing time card software. Whether you use TimeClick or a different solution, securing your system to prevent an employee from changing the computer time is imperative.
A single computer time clock does not have a time sync option and relies on the computer’s internal clock. Securing the time in this situation is simply a matter of being in control of who the computer allows to change the time settings. The following are steps to take control of your computer’s time changing privileges – no IT degree required.
Default time settings for Windows Vista, 7, 8, or 10
By default, all Administrators (as a group) can change date and time. Standard Users cannot.
What this means is that if you set up two accounts in Windows, an Administrator and a User, then the Administrator account is the only one that can change the internal clock time. Restricting the employees to the standard User account prevents them from having access to the time settings. In this scenario, keeping the clock secure is the same as withholding the Administrator password or preventing Administrators from changing the clocks.
Enable or disable a user or administrator to change date and time
Note: Must have administrator privileges.
Usually the default settings work well since a standard user can’t access the time settings. Sometimes, however, it makes sense to restrict the date and time privileges to a single administrator.
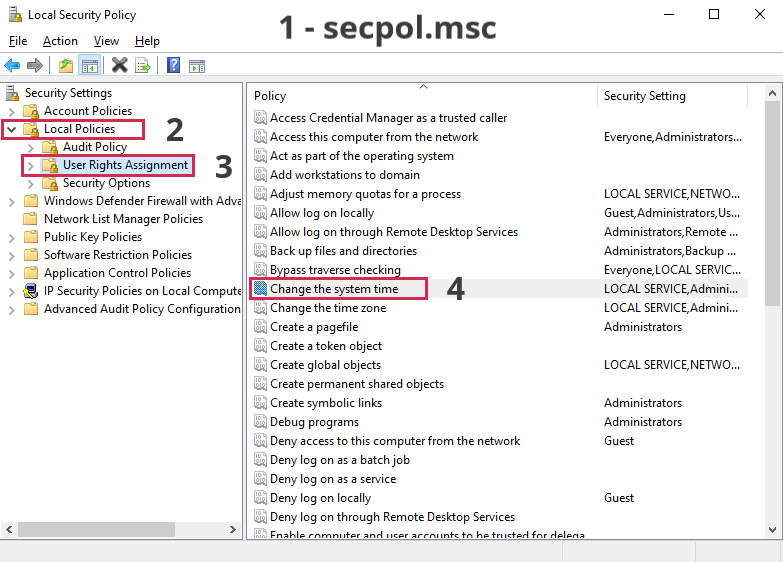
Step 1: Open Local Security Settings
- Click on the Windows Start button and enter secpol.msc into the search bar
Alternatively you may open Control Panel -> Administrative Tools -> Local security Policy
- Select Local Policies
- Double-click User Rights Assignment
- Double-click Change the system time
Step 2: Allow or Disallow Administrator and Users.
Note: Do NOT remove LOCAL SERVICE.
Since the default is to allow all Administrators, we need to remove this group.
- Highlight Administrators in the Change the system time Properties
- Click Remove button.
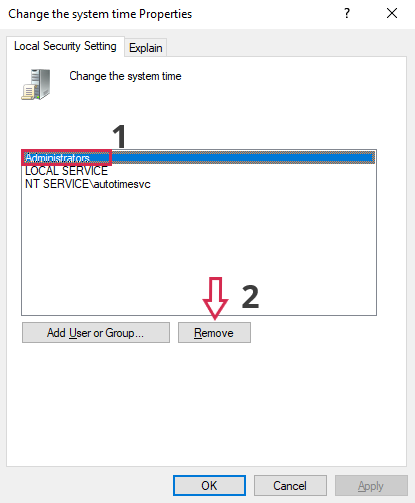
Optional: To prevent even Administrators from changing the clocks, select Remove and then restart your computer; you can always follow the next steps to add back in Administrators’ ability to change the time and date
Now we will allow a specific administrator (instead of all administrators) to have exclusive access to date and time settings.
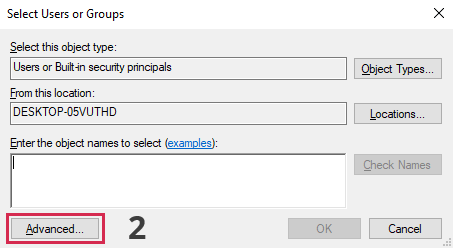
- Click on the Add User or Group… button
- Click on the Advanced… button
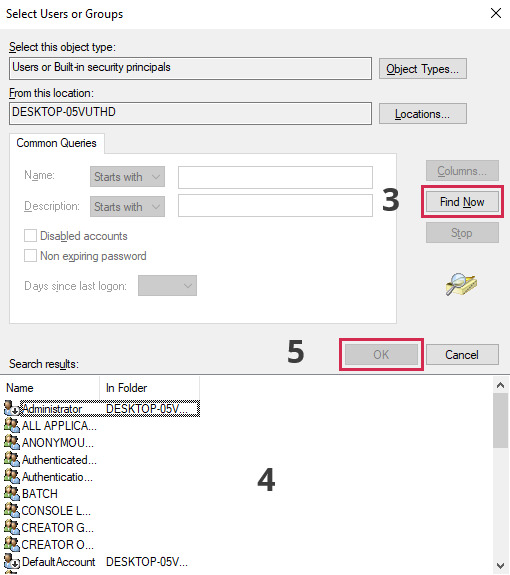
- Click on the Find Now button
- Select the name of the Administrator
Note: by default, groups are not shown. If you wish to re-add the entire Administrator group (Administrators) then you need to change the object type to include Groups by selecting Object Types…
- Click OK
If you are running Windows 10 you will now need to restart your computer for the changes to take effect.
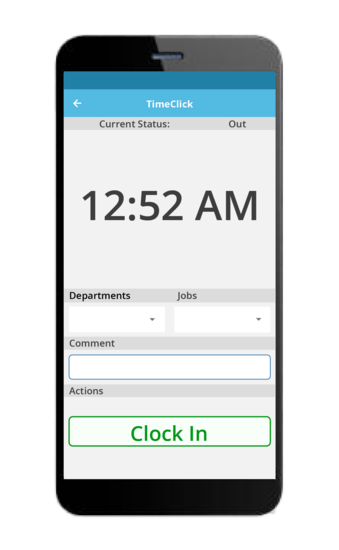
Note: The network version of TimeClick has a built-in feature to sync all clock actions with the server clock. An inaccessible server is usually a sufficient hindrance to would-be time thieves. If you are a TimeClick customer, please contact the support team to make sure the time sync feature is properly configured.
Ready to streamline your employee time tracking, boost productivity, and simplify payroll? Sign up for your FREE 14-day trial today and see how TimeClick can transform your business!
Start your FREE TimeClick Trial Today.